GIRLS CAMP IS COMING!

For a mutual activity (longer ago than I would like to admit) we all made four Secret Sister gifts -- one for each night at camp. Here's how to do it yourself.
You May Also Like:
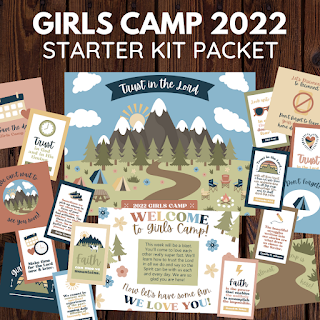
Planning girls camp? Come grab your copy of treat tags, textables, devotional helps & more! ❤Designed for young woman by a young woman to make your life easier. 😘
MAJOR SUPER IMPORTANT UPDATE:
A year later I created some hand-lettered updated tags that you can get for free in the updated post.

Check out the UPDATED secret sister gifts with much cuter ideas and tags -- that everyone is loving-- right now!!
___________________
The first Secret Sister gift that we made were some cute little bookmarks. Most importantly, they were cheap. I found the idea from The 36th Avenue blog on Pinterest and tried to recreate it the best I could.
I made this printable to go with them:

You can print some of your own copies for free right here.
 |
| Before. |
 | ||
After.
They were a breeze to make and super easy. All you had to do was hot-glue them to paperclips. This is the final result, attached to the printout I made:  Love it!! Next up we made some bug rocks. It's kind of hard to explain how to use them, but just thought that they were a) cute and b) you can't have girls camp without bugs! We used plastic gems, scrapbooking paper, tiny googly eyes, and small resealable plastic bags to hold them in. I think the brand of the bags was Fab Lab Craft, they were bought from JoAnn. I made a printout which you can staple to the top of the mini bags; it is about 2 x 4 in. (The bags were 5 x 4 in)  You can get some of your own copies here. My other fellow class member taught how to make those, and it is very simple. You just take the gems, and attach scrapbooking paper to the bottom. Then you add on googly eyes and place them into the small bags. Here is the final product, with the printable attached. I ended up rolling it up, tying it, and placing it into the cute little bag.  Next up were washer necklaces. There are tons of tutorials on these on Pinterest, so I'm just going to link to this one by Thrifty and Thriving. It basically says everything that you need to do, I will just reiterate that you will need washers, twine or string, craft paper, diamond glaze, scissors, brushes, and Mod Podge. They say you need clasps, which is fine, unless you are on a tight YW Ward budget. So we just tied ours -- you can do a simple slip know and you're good to go. I made a cute printable go with them that you can print out right here. The reason that it is partly upside down is that you can print it out and then fold it over, and kind of string the necklace through it.  This is the final product, with the printable attached. Lol, the necklace is peeking out behind the printout!  Finally, we made some button bracelets. The knot tying wasn't so bad. The tutorial for this can be found at All Things Target, right here. I made a little printout to attach to a tiny gift bag/pouch. It is the same size as the bug tags, approximately.  I think it turned out cute!! For the button bracelet craft, you will want to read that tutorial which I linked, but basically, you'll need cute wooden buttons and string to go with them. You can print out these printables, which you will need as well, here. The final product... I don't know why this text is so small... 
I folded over the printable and placed it in the bag.
And there you have it! Four Secret Sister gifts! Here's a cute little photo of them all laid out, ready to be brought to camp and gifted. Boom! That feels good. One thing checked off the to-do list.  Decorated shoebox + shredded paper cushioning = the perfect container! Feel free to share this post, but please link to this post and not any of the Docs. Thx!  |

.png)


No comments:
Post a Comment